Monday, April 1, 2024
-
4
min
How to improve your React Native 3D animations: camera control with Three.js

This is the third post in a series exploring 3D animations using React, React Native, Expo, and the powerful Three.js library.
In the previous posts, we covered:
- Setting up an Expo project with Three.js: We got you started with the essentials.
- Creating 3D Animations with Three.js: Let's get those objects moving!
Now, we'll explore cameras and their basic handling in Three.js, building on the foundation laid in the previous posts.
Want to see the code in action? Check out the final example on Github:
https://github.com/morrowdigital/threejs-react-example
Want experts on your side to drive forward your project? Need a second opinion on something? We’re here to help.
Picking Up Where We Left Off
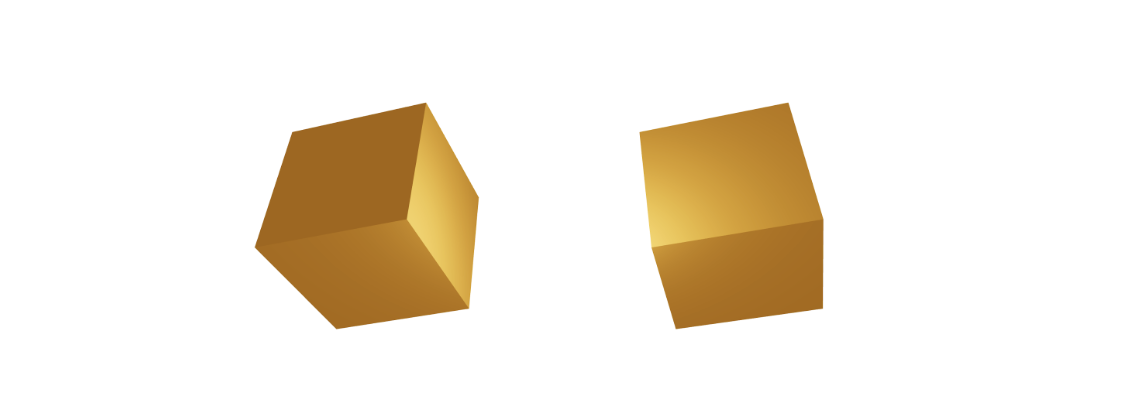
Remember those two rotating, clickable cubes from the last blog post?
That code utilised a Canvas with two Box components animated using the useFrame hook.
Now, let's level up by adding camera controls! We'll focus on zooming and side-to-side movement for simplicity and achieve this using two Slider components. What we want to achieve is the following.
Before we jump into the code and start manipulating the camera, let's take a quick detour to understand the theory behind cameras in Three.js. This foundational knowledge will be crucial for effectively controlling the view of our 3D scene.
Cameras in ThreeJS
Three.js offers different camera types to define how your scene is viewed. Here's a quick breakdown of the two most common ones:
1. Perspective Camera:
This is the go-to camera for mimicking real-world vision. It creates a sense of depth, making closer objects appear larger and farther objects smaller – just like our eyes perceive the world. Properties like field of view (FOV) control how wide or narrow the camera "sees" and aspect ratio determines the width relative to the height (usually matching your screen dimensions).
2. Orthographic Camera:
This camera type projects the scene uniformly, like a blueprint. Objects appear the same size regardless of their distance from the camera. It's useful for technical applications where maintaining consistent scale is crucial.
The Frustum: Your Viewfinder
Imagine a pyramid-shaped volume extending outwards from the camera. This is called the frustum and defines the portion of the 3D world that will be rendered. Objects outside the frustum won't be visible in the final output.

Zooming In and Out
Zooming in a perspective camera effectively adjusts the field of view. A lower FOV narrows the viewing angle, making objects appear closer and larger, mimicking a zoom lens. Conversely, increasing the FOV widens the view, making objects appear smaller, similar to zooming out.
By understanding these camera concepts, you'll be well-equipped to control the perspective and zoom level in your Three.js projects, crafting the perfect view for your 3D scenes!
You can get more details on Camera here.
Lights - Making the scene a bit more interesting
Before we delve into camera controls, let's add some depth and visual interest to our scene by incorporating lighting. A well-lit scene can make a world of difference in how your 3D objects appear.
We'll be adding two types of light:
Ambient Light: This acts as a general light source, casting a soft glow on all objects in the scene. It helps to reduce harsh shadows and create a more natural overall lighting effect.
Spotlight: As the name suggests, this light focuses on a specific area. We'll position it above the cubes (0, 0, 0) to highlight them with a directional white light. This will create more definition and depth, allowing for better visualisation of the cubes' shapes and textures.
By combining these lighting elements, we'll transform our scene from flat and basic to one that's visually engaging and more appealingly showcases our 3D objects.
Before our cubes can truly interact with the lighting effects we added, we need to make a slight adjustment to their material. Inside the Box component, let's swap the meshBasicMaterial with a meshStandardMaterial.
Here's the key difference: meshBasicMaterial doesn't respond to light sources in the scene, meaning it won't cast or receive shadows. On the other hand, meshStandardMaterial takes lighting into account, creating a more realistic and visually appealing look.
Keeping Things Organised: A Touch of Refactoring
Keeping things clean and organised becomes increasingly important as we build our project.
To make manipulating the camera easier, we'll need to access the camera object itself. Thankfully, react-three-fiber provides a handy hook called useThree for this purpose.
However, the useThree hook can only be used within a component wrapped by the Canvas element. To address this, we'll introduce a bit of refactoring:
- Create a Scene Component: We'll extract the contents of the Canvas element and move them into a separate component called Scene. This will keep our code more modular and easier to manage.
- Isolate the Box Component: While we're at it, let's also move the Box component definition into its file. This promotes better code organisation and reusability.
App.tsx
Scene.tsx
Box.tsx
Camera Manipulation in Three.js
ThreeJS operates with an imperative programming style, meaning we directly update object properties rather than relying on reactive updates. This is important to remember as we delve into camera manipulation.
Here's how we'll control our camera:
Zooming:
The camera.zoom property controls the zoom level. By default, it's set to 1. Increasing this value zooms in, making objects appear larger. Conversely, decreasing it zooms out, making objects smaller.
Positioning:
We can manipulate the camera's position in two ways:
- Update the entire camera.position object with a new set of coordinates (x, y, z).
- Modify individual position components like camera.position.x, camera.position.y, and camera.position.z for granular control.
In our example, we'll focus on updating the x coordinate to move the camera left and right.
Remember, the default camera position in react-three-fiber is [0, 0, 5], where:
- X-axis: Left-to-right movement
- Y-axis: Top-to-bottom movement
- Z-axis: Closer (higher value) or farther (lower value) from the scene
Now that we understand camera manipulation let's bridge the gap and connect our sliders to control the camera in real time! Here's how we'll achieve this:
Passing Camera Props: We'll pass two props, cameraZoom, and cameraX, to the Scene component. These props will hold the current zoom level and x-position values, eventually provided by the sliders we'll implement later.
Responding to Prop Changes: Inside the Scene component, we'll utilise the useEffect hook to react to changes in these props. This ensures that whenever the slider values adjust, the camera updates accordingly.
Updating Camera and Re-rendering: Within the useEffect hook, we'll update the camera object based on the received prop values. Remember, after modifying the camera's zoom or position, we need to call the updateProjectionMatrix method to reflect these changes in the rendered scene. This ensures the camera movement is visually reflected on the screen.
Scene.tsx
Bringing it All Together: Sliders and Interactive Control
The final portion of the code utilises familiar React/React-Native concepts. We'll leverage the @react-native-community/slider package to integrate two sliders into our scene, enabling user interaction:
X-Position Slider: This slider allows users to move the camera left and right across the scene. The range extends from -2 to +2, providing a good balance of control and keeping the camera within reasonable bounds.
Zoom Slider: The second slider empowers users to zoom in and out. It offers a range between 0.5 and 2.
With these sliders in place, users can control the camera, panning left and right or zooming in and out to explore the 3D scene from different angles and magnifications.
App.tsx
Reminding that you can find the source code for this at our Github Repository:
https://github.com/morrowdigital/threejs-react-example/
What's Next? Exploring Advanced Camera Control
Congratulations! You've successfully implemented basic camera controls in your React Native/Expo project using Three.js, which opens the door to creating more dynamic and interactive 3D experiences.
As you venture further into the world of 3D animation, you might encounter a fantastic library called drei (https://github.com/pmndrs/drei?tab=readme-ov-file#cameracontrols). It boasts a rich set of camera control features, including:
- Rotation: Effortlessly navigate your scene by panning and rotating the camera.
- Dolly Zoom (Hitchcock Zoom): This technique creates the signature cinematic effect of warping the scene while zooming in or out.
- Smooth Transitions: Enjoy seamless camera movements for a polished and professional look.
While drei offers an enticing array of functionalities, it's important to note that it currently supports only web environments that leverage the DOM (Document Object Model).
For React Native and Expo specifically, you can explore the expo-three-orbit-controls library (https://github.com/EvanBacon/expo-three-orbit-controls). This community-developed package provides basic camera controls like panning, rotating, and zooming. However, it's essential to be aware that Three.js, in general, has a more robust and well-established ecosystem on the web compared to React Native/Expo.
Remember, the journey of learning Three.js is an ongoing exploration. Keep experimenting, delve deeper into resources, and don't hesitate to seek out the vibrant Three.js community for support and inspiration.
Happy animating!
Read "Add shapes and textures to 3D animations with React, Expo and ThreeJS" next.
Want experts on your side to drive forward your project? Need a second opinion on something? Contact us!

.jpg)