Monday, April 15, 2024
-
5
min
Add shapes and textures to 3D animations with React, Expo and ThreeJS

Want experts on your side to drive forward your project? Need a second opinion on something? We’re here to help.
Welcome back to our animation series! In this part, we'll dive deeper into creating captivating 3D experiences by adding more shapes (geometries) and applying textures (skins) to them.
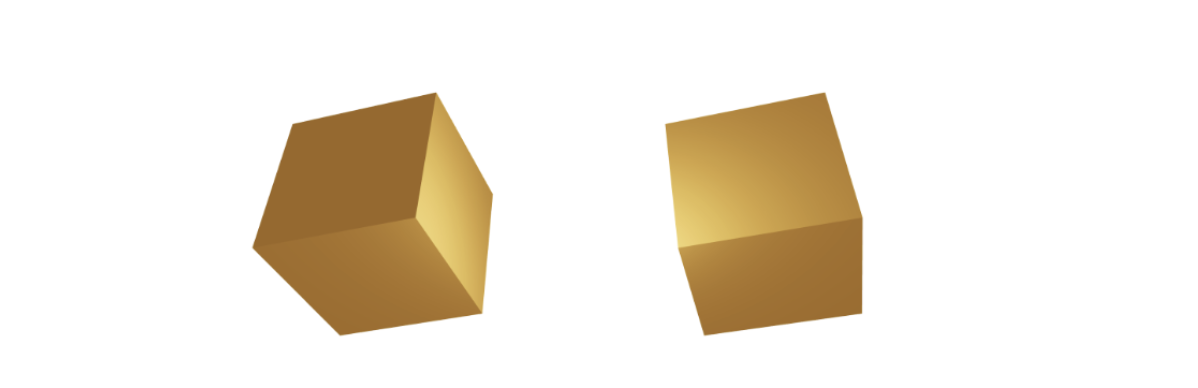
Remember those cool rotating cubes we built in the last blog post? We'll use that foundation to expand our scene with even more visual interest.
Get ready to unleash your creativity!
Codebase:
You can find the code for this part, building upon what we created in Part 3, here: https://github.com/morrowdigital/threejs-react-example/tree/snapshot-part-4
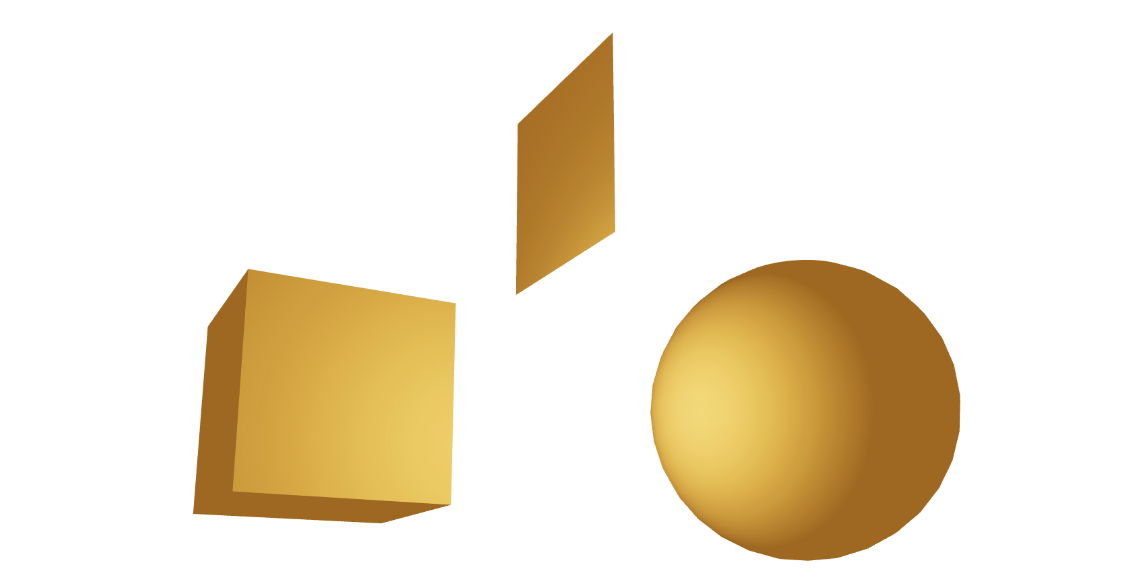
Introducing a Sphere!
Let's replace one of our cubes with a smooth sphere that rotates alongside it. We can achieve this by creating a new component called Sphere that's similar to our Box component but uses a different geometry.
Instead of boxGeometry, we'll be using sphereGeometry. This function lets you customise the sphere in various ways (check the documentation for all the details), but for now, we'll focus on the radius argument, which controls the sphere's size. By default, it's set to 1, but we'll adjust it to 0.75 to make the sphere visually match the size of the cube.
Sphere.tsx
And we add the sphere to our Scene.tsx:
The image you see now might make the sphere look frozen, even though the cube rotates.

Don't worry, the sphere is actually spinning, too! Its smooth surface just doesn't show the rotation as clearly. We'll address that later to make it more visually interesting.
To confirm the sphere's movement, we can temporarily enable a "wireframe" mode in the Sphere.tsx component. Add the following line (commented out initially) inside the <meshStandardMaterial> tag:
This will display the sphere's edges, making its rotation much easier to see. Once you see the wireframe rotating, you can uncomment the line to enable it for debugging purposes.

Here's a hidden detail about 3D shapes in ThreeJS: they're built from tiny triangles! The smoother and more intricate a surface appears, the more triangles are used to create it. This also means the rendering and animations can become more demanding on your computer's resources.
For spheres, the default settings (32 width segments and 16 height segments) strike a good balance between visual quality and performance. But let's see what happens when we use the minimum allowed segments (3 width segments x 3 height segments). Take a look at the image below – it's definitely not a very smooth sphere anymore!

ThreeJS offers even more control over how spheres are rendered. By defining phi and theta angles, you can choose to display only a specific portion of the sphere's surface, allowing for interesting effects like hemispheres or wedges.
We won't explore this functionality in detail for now, but it's worth considering for future experimentation.
Let's switch the Sphere.tsx component back to its normal rendering (remove the wireframe prop) and continue exploring other aspects of our 3D scene.
Read: "Building an offline-first app with Expo, Supabase and WatermelonDB: Authentication".
Let’s Add a Plane
Now, let’s also look at a 2D shape in 3D space.
Create the following component that renders a rectangle:
And in Scene.tsx:
The magic happens in this line:
This line defines the plane's geometry, specifying its width and height.
Here's another key detail: in the meshStandardMaterial component, we've set the side property to DoubleSide. This allows the plane to display both its front and back surfaces during rotation. It's important to note that this is not the default behaviour.
Experimenting with Visibility
Try removing the side prop from the meshStandardMaterial component and observe how the plane behaves when it rotates. You'll notice that it disappears from view when its backside should be displayed. This is because, by default, materials only render the front-facing sides of meshes.
Colourful Cubes: Applying Unique Materials
Ready to unleash some creativity? With ThreeJS, you can define a different material for each cube's surface. This opens up a world of possibilities, allowing you to create multicoloured cubes, apply textures, or even use different lighting effects on different sides!
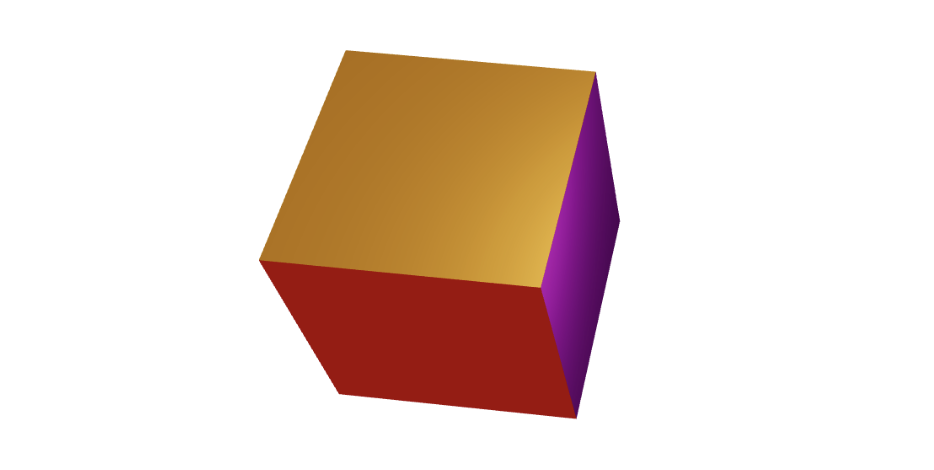
So, how do we actually paint each side of the cube a different colour? Here's where things get interesting! ThreeJS allows you to include multiple material components within the mesh component for our cube. Each material needs an attach property to tell ThreeJS which surface it should be applied to.
The attach property takes values from material-0 to material-5, corresponding to the six faces of the cube.
In Box.tsx
Read: "React Native developers, here are the top 5 reasons why you should consider using Expo in 2024."
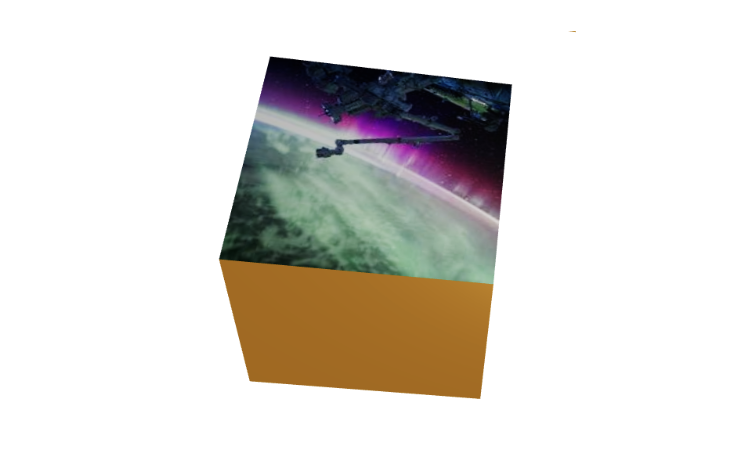
Bringing Art to Your Cube: Adding Images to 3D shapes with ThreeJS
Now, let's go beyond colours and add some real visual flair! ThreeJS allows materials to display bitmap images (like JPEG or PNG) on your cube surfaces.
Image Loading with react-three/fiber
To incorporate an image, we'll leverage the power of react-three/fiber. This library provides a useLoader hook that allows us to suspend rendering while the image loads, ensuring a smooth user experience. However, the image loading itself is handled by the TextureLoader class, which is part of the core ThreeJS library.
So in our Box.tsx
(see inline comments)
Because the useLoader hook will suspend while fetching the image, we need to add a <Suspense> component to catch. For simplicity, we add it to the root in App.tsx
One of the surfaces of our cube should now display the image.
Creating patterns with ThreeJS: tile textures
In the world of 3D scenes, a common need is to display surfaces covered in repeating patterns, like tiles in a bathroom or bricks on a wall. ThreeJS has you covered! Let's transform our rectangle plane into a tiled surface using a 2x2 grid of a single image.
The process is similar to loading a single image but with an extra step: configuring the texture object for repetition. We'll achieve this by setting three key properties:
- repeat: Defines the number of times the tile will be repeated horizontally and vertically. In this case, we'll set it to 2 for a 2x2 grid.
- wrapS: Controls how the texture wraps horizontally (across the S axis). We’ll use the RepeatWrapping value for continuous repetition.
- wrapT: Controls how the texture wraps vertically (across the T axis). It works similarly to wrapS.
By adjusting these properties, you can fully customise how your repeating tile textures appear on your 3D surfaces.
The result should be:

Partner with Morrow to transform your Expo app into a high-performing, secure, and user-friendly solution. Fill out our Expo audit form and take the first step towards app excellence.
Earth in 3D: Dressing the Sphere with Assets
Let's turn our sphere into a beautiful representation of planet Earth! This time, we'll take a different approach and use an image stored in our project's assets folder instead of loading it directly from the internet.
However, working with local assets in a web environment requires a special step. We need to obtain a URL that points to the image within our Expo application's bundled assets. To achieve this, we'll leverage the expo-asset package.
The first step is to install the expo-asset package in our Expo project.
Then, we create a separate ‘wrapper’ component that handles the loading of the Asset and the URL. Until the URL is available the actual sphere component is not rendered. Once the URL is available, it is passed down the the sphere component.
So our Sphere component becomes:
The Sphere component becomes:
And our sphere now is planet Earth:

Behold Your Creation: A Dynamic 3D Scene!

Read: "How to set up a secure Supabase project".
Wrap up
In this part of our ThreeJS with React series, we journeyed beyond basic shapes to explore adding textures and manipulating geometries. We transformed a simple scene with cubes and a sphere into a visually engaging composition. You learned how to apply images as textures, create tiled surfaces, and even utilise local assets from your project. This is just a stepping stone – keep practising and unleash your creativity to build stunning 3D experiences with ThreeJS and React!
Happy Coding!

.jpg)